ShelterLogic 10×20 Canopy Instructions: A Comprehensive Guide
Welcome! This guide provides detailed instructions for assembling your ShelterLogic 10×20 canopy, ensuring a secure and enjoyable outdoor experience.
Two adults can typically assemble it within two hours, utilizing wedged piping and a Twist-Tite tensioning system for optimal stability and cover tightness.

Understanding Your ShelterLogic 10×20 Canopy Kit
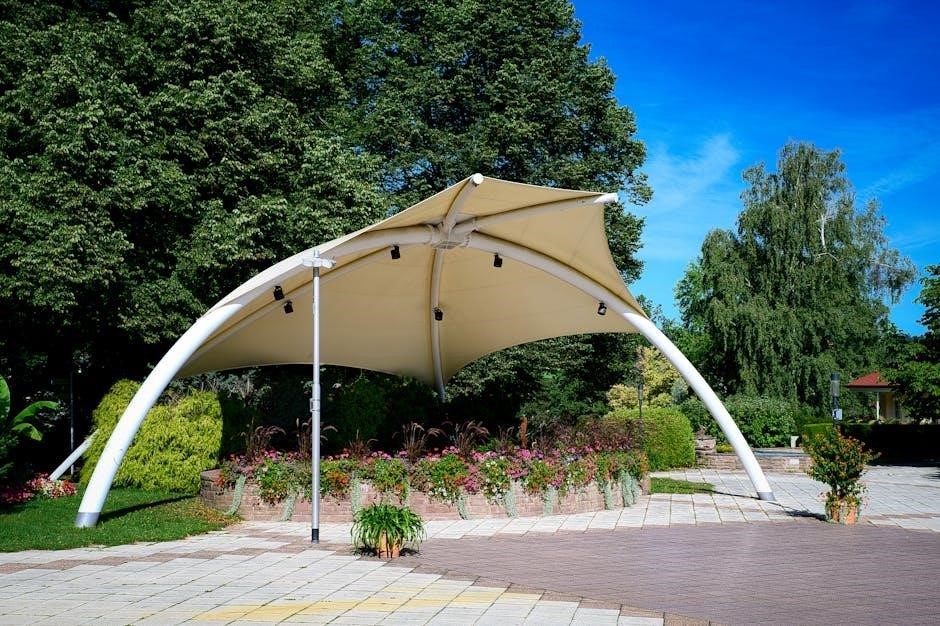
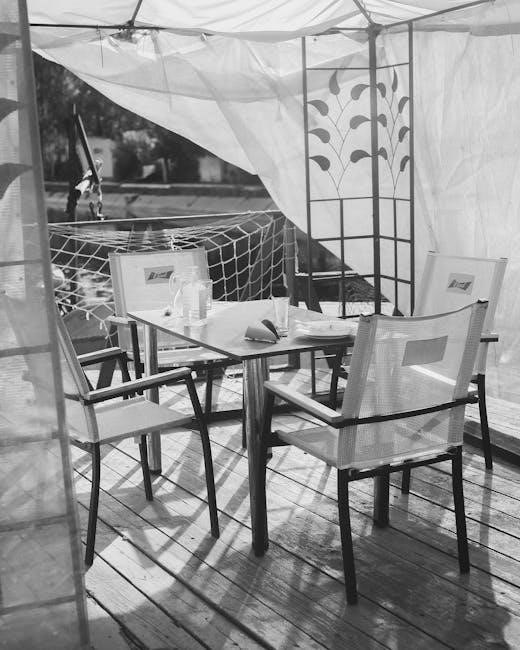
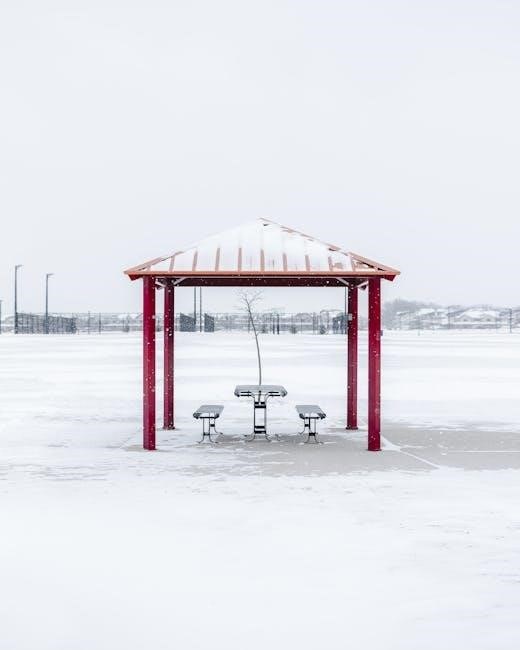
Familiarization is key! Your ShelterLogic 10×20 canopy kit is designed for versatile outdoor use, functioning as a gazebo, carport, or portable garage. The kit primarily consists of a heavy-duty steel frame, a waterproof cover offering 50 UPF sun protection, and essential anchoring components.
The frame utilizes a quick-fit slip-together wedged tubing system for simplified assembly. The included cover secures to the frame via a patented Twist-Tite tensioning system, ensuring a taut and weatherproof fit. Foot plates provide a stable base, while bungee cords and optional ground stakes enhance overall stability.
Understanding these core components before beginning assembly will streamline the process and guarantee a robust, long-lasting structure. Always refer to the included instructions for specific part identification and assembly sequences.
Kit Contents Verification
Before you begin, verify all components are present! Your ShelterLogic 10×20 canopy kit should include one 10×20 steel frame, one white canopy cover, and six foot plates for anchoring. A complete anchoring set, including bungee cords, is also essential for securing the structure.
Carefully unpack all items and cross-reference them with the parts list in the instruction manual. Ensure all frame sections are accounted for, along with the necessary connectors and hardware. Inspect the canopy cover for any damage or defects before proceeding.
Missing parts can delay assembly. If anything is missing or damaged, do not attempt assembly and immediately contact ShelterLogic customer support for replacements. A thorough inventory now saves time and frustration later.
Safety Precautions During Assembly
Prioritize safety during assembly! Wear appropriate eye protection, such as goggles, especially when installing bungee cords, as they are under extreme tension and can cause severe injury if they snap back. Be mindful of pole ends during overhead pole connection to avoid accidental injury.
Assemble the canopy on a flat, stable surface, clear of obstructions. Two adults are recommended for safe and efficient assembly. Exercise caution when handling frame components, as they can be heavy and have sharp edges.
Never attempt assembly during inclement weather, such as high winds or storms; Always secure the canopy to a stable foundation using the provided anchoring set to prevent it from becoming airborne.
Step-by-Step Assembly Process
Begin the build! This process is divided into two key phases: frame assembly, focusing on leg and pole connections, and cover installation utilizing the Twist-Tite system.
Phase 1: Frame Assembly
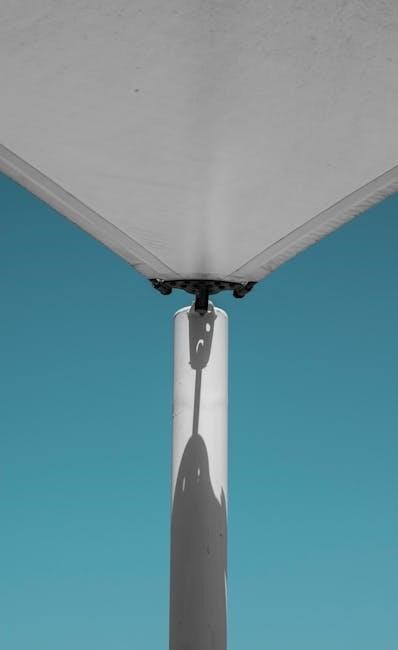
Initiate the structural foundation by carefully connecting the leg sections. The ShelterLogic canopy employs a quick-fit slip-together wedged tubing design, simplifying this initial step. Ensure each connection is firmly seated for maximum stability.
Next, focus on assembling the overhead poles. Pay close attention during this stage, being mindful of the pole ends to prevent injury. Align and connect the poles, creating the canopy’s upper framework. This phase requires careful attention to detail, as a properly assembled frame is crucial for the canopy’s overall integrity.
Remember to work with a partner for easier handling of the frame components. A well-constructed frame will provide a solid base for the cover installation in the subsequent phase.
Connecting the Leg Sections
Begin the assembly by joining the individual leg sections to form the complete canopy legs; The ShelterLogic 10×20 canopy utilizes a clever “wedged piping” system, designed for straightforward connection. Simply slide the sections together, ensuring a snug and secure fit.
Apply gentle pressure to fully seat the connections; avoid excessive force. Verify that each leg section is firmly attached before proceeding. Proper connection of the legs is paramount for the canopy’s stability and weight distribution.
Inspect each connection point to confirm alignment and stability. A solid foundation of connected legs will support the entire canopy structure, ensuring a safe and reliable shelter. This step is crucial for a successful assembly.
Assembling the Overhead Poles
Once the legs are connected, focus on assembling the overhead poles that form the canopy’s roof structure. Carefully connect the pole sections, again utilizing the slip-together wedged tubing system for ease of assembly. Pay attention to the orientation of each pole section to ensure proper alignment.
During assembly, be mindful of the pole ends to prevent any accidental injury. It’s recommended to work with a partner to manage the poles effectively. Securely attach the overhead poles to the assembled leg frame, creating the canopy’s basic shape.
Double-check all connections to guarantee a robust and stable overhead structure. This framework will ultimately support the canopy cover, so a solid assembly is essential for weather resistance and overall durability;
Phase 2: Cover Installation
With the frame fully assembled, it’s time to install the canopy cover. Carefully unfold the white cover and position it over the frame, aligning the edges with the frame’s perimeter. Ensure the cover is evenly distributed to prevent uneven tension later.
The ShelterLogic canopy utilizes a patented Twist-Tite tensioning system. This system tightens the cover securely to the frame, providing a taut and weatherproof fit. Begin attaching the cover using the provided fasteners, working your way around the frame systematically.
Pay close attention to the valance cover, attaching it to the frame with bungee fasteners for a snug and secure fit. Proper cover installation is crucial for protecting against the elements and maximizing the canopy’s lifespan.
Attaching the Cover to the Frame
Begin by carefully draping the canopy cover over the assembled frame, ensuring even distribution. Align the cover’s corners and edges with the frame’s corresponding points. This initial positioning is vital for balanced tensioning.
Locate the attachment points on both the cover and the frame. These are typically reinforced areas designed to withstand stress. Secure the cover using the provided fasteners – often clips or straps – starting with the corners. Work systematically around the perimeter, ensuring each attachment point is firmly secured.
Maintain consistent tension as you attach the cover. Avoid pulling too tightly on one section, which could distort the frame or damage the cover. A gradual, even tightening process will result in a secure and weatherproof installation.
Utilizing the Twist-Tite Tensioning System
The Twist-Tite system is crucial for a taut and secure canopy cover. Locate the tensioning straps, typically running along the canopy’s sides. These straps connect to ratcheting buckles integrated into the frame.
Begin tightening the straps incrementally, alternating between opposite sides to ensure even tension. Rotate the buckles clockwise to tighten, observing the cover’s fit. Avoid over-tightening, which could strain the frame or damage the cover’s fabric. A snug, wrinkle-free fit is the goal.
Periodically check the tension, especially after initial setup and following exposure to weather changes. Re-tighten as needed to maintain optimal cover security. This patented system provides superior tensioning compared to traditional methods, enhancing the canopy’s stability and longevity.
Securing Your Canopy
Essential for safety, always secure your ShelterLogic canopy to a stable foundation using the included anchoring set and bungee cords for maximum stability.
Foot Plate Anchoring
Robust foot plates are a crucial component of securing your ShelterLogic 10×20 canopy. These wide plates distribute the canopy’s weight, enhancing stability and preventing tipping, especially in windy conditions. The kit includes six foot plates, designed to be anchored directly to the ground.
To utilize them effectively, position a foot plate at the base of each leg. Ensure the plate is flat against the ground. You can then drive stakes through the designated holes in the foot plates to firmly secure them. For more permanent installations on surfaces like patios or decks, consider using concrete anchors (not included) for a stronger hold. Regularly inspect the foot plates and anchors for wear and tear, replacing them as needed to maintain optimal safety and stability. Proper foot plate anchoring is paramount for a worry-free canopy experience.
Using Bungee Cords for Stability
Bungee cords are integral to reinforcing your ShelterLogic 10×20 canopy’s structural integrity, working in conjunction with the foot plates. These cords connect the canopy cover to the frame, providing additional tension and resistance against wind uplift. Exercise extreme caution during installation, as bungee cords are under significant tension and can snap back with force.
Always wear safety goggles to protect your eyes. Attach the bungee cords to the designated loops on both the canopy cover and the frame legs, ensuring even distribution of tension. Regularly inspect the bungee cords for signs of stretching, fraying, or damage, replacing them promptly if necessary. Proper bungee cord usage significantly enhances the canopy’s ability to withstand moderate wind conditions, contributing to a safer and more reliable shelter.
Additional Anchoring Options (Ground Stakes, Weights)
Beyond foot plates and bungee cords, bolstering your ShelterLogic 10×20 canopy’s security requires considering supplemental anchoring. For grassy or soft ground, heavy-duty ground stakes offer a robust solution, driven deeply into the earth to resist lifting. On hard surfaces like concrete or pavement, ground stakes are ineffective; instead, utilize weighted anchor bags.
These bags, filled with sand or water, provide substantial weight to counteract wind forces. Distribute the weight evenly around the canopy’s perimeter for optimal stability. Remember, always secure the canopy to a stable foundation. Combining multiple anchoring methods – stakes where possible, weights elsewhere – delivers the highest level of protection against unexpected weather, ensuring your canopy remains firmly grounded.
Maintenance and Care
Prolong your canopy’s life by regularly cleaning the cover and preventing frame rust. Proper storage during off-season is also crucial for longevity and performance.
Cover Cleaning and Protection
Maintaining your canopy cover is essential for its longevity and appearance. Regularly clean the cover with mild soap and water, using a soft brush or sponge to avoid damage. Avoid harsh chemicals or abrasive cleaners, as these can degrade the material and reduce its waterproof capabilities.
After cleaning, ensure the cover is thoroughly rinsed and allowed to dry completely before re-installation. Consider applying a waterproof sealant periodically to enhance its resistance to the elements and protect against UV damage. This will help prevent fading and cracking, extending the life of your canopy cover. Inspect the cover regularly for any tears or punctures and repair them promptly to prevent further damage.
Frame Maintenance (Rust Prevention)
Protecting the steel frame from rust is crucial for ensuring the long-term durability of your ShelterLogic canopy. Regularly inspect the frame for any signs of corrosion, particularly at joints and connection points. Clean any dirt or debris from the frame with a damp cloth.
To prevent rust, consider applying a rust-inhibiting spray or coating to the frame, especially if you live in a humid or coastal environment. Regularly check the foot plates and anchoring points for corrosion as well. Proper storage during the off-season is also vital; ensure the frame is clean and dry before storing it in a sheltered location. Addressing rust early will significantly extend the lifespan of your canopy’s frame.
Storage Guidelines
Proper storage significantly extends the life of your ShelterLogic 10×20 canopy. Before storing, thoroughly clean both the frame and cover, ensuring they are completely dry to prevent mildew and rust. Disassemble the frame as much as possible for more compact storage.
Store the canopy in a dry, sheltered location, such as a garage, shed, or basement. Avoid storing it directly on the ground; use a pallet or tarp to protect it from moisture. The cover should be stored loosely folded, not tightly packed, to prevent creasing and damage. Regularly inspect the stored canopy for any signs of deterioration and address them promptly. Following these guidelines will ensure your canopy remains in excellent condition for years to come.

Troubleshooting Common Issues
Addressing problems like frame instability or cover tension is straightforward. Check connections, ensure proper anchoring, and utilize the Twist-Tite system for adjustments.
Dealing with Frame Instability
If your ShelterLogic canopy frame feels unstable, begin by meticulously checking all connections. Ensure each leg section is firmly locked into place, utilizing the wedged piping system correctly. Verify that the overhead poles are securely connected, paying attention to potential weak points.
Proper anchoring is crucial. Confirm the foot plates are firmly positioned and anchored to the ground using the provided anchoring set – bungee cords, ground stakes, or additional weights. Uneven ground can contribute to instability; attempt to level the area before setup.
Inspect for bent or damaged poles. If found, replacement is recommended for safety. Remember, a stable frame is paramount for withstanding wind and ensuring the canopy’s longevity. Always prioritize safety during assembly and use!
Addressing Cover Tension Problems
Loose or uneven cover tension can compromise your ShelterLogic canopy’s performance. The patented Twist-Tite tensioning system is key to resolving this. Ensure it’s engaged correctly, tightening the cover evenly across the frame. Begin by adjusting tension on opposite sides to distribute stress equally.
Check bungee cord placement. These cords secure the cover to the frame; confirm they are properly attached and have sufficient elasticity. If cords are stretched or damaged, replace them immediately.
Wind can affect tension. Regularly inspect and readjust the tensioning system, especially after windy conditions. A taut cover minimizes flapping and maximizes weather protection. Remember, consistent maintenance prevents larger issues and extends the canopy’s lifespan.
Replacing Damaged Parts
Maintaining your ShelterLogic canopy sometimes requires replacing worn or damaged components. Prioritize genuine ShelterLogic parts to ensure compatibility and maintain warranty validity. Damaged poles, connectors, or the cover itself should be replaced promptly for safety and structural integrity.
Contacting customer support is the best first step to identify the correct replacement part. Have your canopy model number readily available. Online retailers also stock common replacement parts, like bungee cords and foot plates.
Frame components often utilize slip-together wedged tubing; disassembly and reassembly are usually straightforward. Always follow the assembly instructions when installing new parts. A well-maintained canopy provides years of reliable shelter.

Canopy Dimensions and Specifications
Exterior dimensions measure 10x20x9.5 feet, while interior dimensions are 98x199x95 feet, providing ample covered space for various outdoor activities.
Assembled Exterior Dimensions (10x20x9.5)
Understanding the overall size is crucial for planning your outdoor space. The ShelterLogic 10×20 canopy, when fully assembled, boasts exterior dimensions of 10 feet in width, 20 feet in length, and a height of 9.5 feet at its highest point.
These measurements account for the entire footprint of the canopy, including the frame and the cover. Consider these dimensions when determining placement in your yard, ensuring sufficient clearance from trees, fences, and other obstacles.
The 9.5-foot height allows for comfortable standing and movement underneath, making it suitable for gatherings, events, or simply providing shaded relaxation. Accurate measurement ensures proper fit and functionality.
Assembled Interior Dimensions (98x199x95)
Knowing the usable space within the canopy is essential for arranging furniture and activities. The ShelterLogic 10×20 canopy provides an interior width of 98 inches (approximately 8.17 feet), a depth of 199 inches (roughly 16.58 feet), and an interior height of 95 inches (7.92 feet).
These dimensions represent the actual area available inside the canopy, accounting for the frame’s structure. This allows for comfortable placement of tables, chairs, and other items.
Careful consideration of these interior measurements will help you maximize the functionality of your canopy, ensuring a pleasant and spacious environment for your outdoor needs. Plan accordingly for optimal use!
Warranty Information
Genuine ShelterLogic parts are crucial for maintaining your canopy’s integrity. Contact customer support for warranty claims and assistance with replacement parts if needed.
Genuine ShelterLogic Parts
Maintaining your ShelterLogic canopy’s warranty and performance relies heavily on using genuine ShelterLogic replacement parts. Utilizing non-approved components can void the warranty and potentially compromise the structural integrity of your canopy.
ShelterLogic designs its parts specifically to work in harmony with the canopy frame and cover, ensuring a secure fit and optimal functionality. This includes leg sections, overhead poles, foot plates, bungee cords, and, crucially, the canopy cover itself.
When sourcing replacements, always verify that the part is officially branded ShelterLogic. Avoid generic alternatives, as they may not meet the same quality standards or safety specifications. Contacting ShelterLogic customer support is the best way to identify the correct part number and ensure authenticity.
Contacting Customer Support
Should you encounter any issues during assembly, require clarification on instructions, or need assistance with replacement parts, ShelterLogic’s customer support team is readily available to help. Prompt and efficient support ensures a smooth experience with your 10×20 canopy.
For immediate assistance, consult the ShelterLogic website for a comprehensive FAQ section addressing common questions and troubleshooting tips. You’ll likely find solutions to many frequently encountered problems there.
If you require direct support, ShelterLogic offers multiple contact channels, including a dedicated phone line and email address. Be prepared to provide your canopy model number and purchase details to expedite the support process. Genuine ShelterLogic parts and expert guidance are just a call or email away!